School of Computing Sciences
FINAL YEAR PROJECT
Simulating Human Behaviour in a Zoo Environment
Emma Cotgrove
Year 2005/2006
Supervisor: Prof AR Forrest
Summary This report describes the project “Simulating Human Behaviour in a Zoo Environment” and describes the approaches and methods implemented, as well as the research which has been done for this project to be successful. This project simulates how humans behave when they are in a Zoo environment. This involved the modelling of humans and animals and then putting them together in an environment where the humans react to the different animals. The humans also react to other events such as rain, where they leave the zoo and they will also enter the zoo again if it stops raining. When the clocks reach a certain time, the humans leave the Zoo. There are currently methods which simulate crowd behaviour and other such methods which are described in the background section. Some events occur in the zoo to which the humans respond, particle systems have been investigated to add rain to the simulation. There are two clocks in the zoo and when these reach closing time the humans leave. If it rains the humans leave the zoo for the duration of the rain. Collision detection has been researched to gain a thorough understanding of different methods to stop the humans hitting other objects and walking through each other. These have aided in making the simulation realistic. This project has been undertaken because it can have many uses such as showing how humans behave when in contact with animals. It could be extended to show how animals behave going from the natural environment to a much different environment. The human behaviour could be included into other such projects such as urban modelling projects, so for example the humans can be put into a university model to show student activities. The simulation is real time and the user can control the camera movements. From this the user can have a look at what the humans are doing in the zoo.
Acknowledgements Thank you to Prof AR Forrest for being the supervisor for this project. For this project to come together the importing of models into OpenGL from 3dsmax was required. The piece of code which dealt with this has been taken from Paul Gasson. His code allowed one 3dsmax model and one animation to be imported into OpenGL Also thanks to Dr Stephen Laycock who helped with the adapting of Paul Gasson’s code.
1
Contents Page Summary
1
Acknowledgements
1
1 Introduction 1.1 Overview 1.2 Aims and measurable Objectives 1.3 Resources used
5 5 5 6
2 Literature survey 2.1 Overview of Simulating Human Behaviour 2.2 Artificial Intelligence, Collision Detection and Collision Avoidance 2.2.1 Artificial Intelligence 2.2.2 Collision Detection 2.2.3 Collision Avoidance 2.3 Character Animations 2.3.1 Vertex / Skeleton Animations 2.3.2 Making Animations Realistic 2.3.3 Motion Capture 2.4 Level of Detail 2.5 Impostors 2.6 Particle systems 2.7 EXODUS 2.8 Critical review
7 7 7 7 7 8 9 9 10 10 10 11 11 12 13
3 Theory / Design 3.1 Initial Approaches 3.2 Animations 3.3 Importing models 3.4 Events 3.5 Environment 3.6 Sound 3.7 Collision 3.8 Animals and Human Movement
15 15 16 16 17 17 17 17 18
4 Implementation 4.1 Importing models 4.2 Animations 4.2.1 Creating the Models 4.2.2 Creating the skeletal structures 4.2.3 Animating 4.3 Events 4.3.1 Rain 4.3.2 Closing Event 4.4 Environment 4.4.1 Inside the zoo 4.4.2 Outside the zoo 4.4.3 Foliage 4.5 Sounds 4.6 Behaviour Implemented 4.6.1 Walking
20 20 20 20 21 22 22 23 23 23 24 24 25 25 26 26 2
4.6.2 Standing at Enclosures 4.6.3 Bumping into each other 4.6.4 Animals 4.7 Animal and Human Movement 4.8 Collision 4.8.1 Animal 4.8.2 Human 4.8.3 Camera 4.9 Problems 4.10 Rejected Method 4.11 Final Solution - Paths
26 27 27 27 28 28 28 29 29 29 29
5 Testing and Results 5.1 Collision 5.2 Behaviour and Animation Sequences 5.3 Human and Animal Movement 5.3.1 Human 5.3.2 Animal 5.4 O’Rourke’s Line Intersection 5.5 Rain
32 32 32 34 34 34 34 35
6 Conclusion 6.1 Success of Project 6.2 Management of the Project 6.3 Further Work
36 36 37 37
References
39
Appendix A: The Environment and models B: Controls for the Simulation C: References of Video’s studied for the animal movements. D: Classes and header files E: Work Plan Diagram
41 41 42 42 43 44
3
Figure List Section 2: Literature Survey Figure 1: Bounding spheres showing a collision. Figure 2: Skeletal Structure of an articulated Object Figure 3: a) 150 faces, b) 500 faces, c) 1,000 faces, d) Original, 13,546 faces Figure 4: The Visibility Catchment Area of a sign for 2 humans Figure 5: The observation probabilities of signs when viewed by a human
8 9 11 12 12
Section 3: Design / Theory Figure 6: The breaking down of the Zoo into block sections Figure 7: The testing of collision detection with surrounding blocks Figure 8: Diagram showing O’Rourke’s line intersection Figure 9: Equation of a line
15 15 18 19
Section 4: Implementation Figure 10: Human Model Figure 11: Penguin Model Figure 12: Human model showing the skeletal structure with IK solvers and Dummy points Figure 13: Screenshot of the clock Figure 14: Dolphin pool sunken into the ground Figure 15: Environment outside the zoo Figure 16: Screenshot which show the clouds Figure 17: Screenshot showing the trees and bushes in the environment Figure 18: Overhead view of the zoo showing paths
21 21 22 23 24 24 25 25 31
Section 5: Testing and Results Figure 19: Screenshot showing the sky grey, the rain and the humans leaving the zoo. Figure 20: Screenshot showing the humans leaving the zoo at closing time 5:45pm Figure 21: The human situations and the sequences Figure 22: Textured Polygon Figure 23: Using GL_LINES
4
32 33 33 35 35
1 Introduction 1.1 Overview This project simulates how humans behave in a crowded environment. As the environment is a zoo there are many animals for the humans to react to and to wander around to see. There are events to which the humans can react such as the zoo closing and rain. The project involves creating models of the animals and humans and then putting them together in an environment with different situations. There have been different projects and applications which have already been undertaken which have already looked into crowd behaviour and other human behaviour. Research into these areas has been undertaken to gain a better understanding of ideas to include in the simulation and more importantly how these ideas can be included. There are many ways to go about animating a model but there are important points to remember to make the models move as realistically as possible which will be discussed in this report. Models can be created and then animated to simulate the human and animal movements, which is needed for the simulation. The environment is just as important as what is happening as the environment needs to be just as realistic for the simulation to be complete. This involves including the surrounding the environment not just the zoo and also objects such as lamp posts, trees etc. 1.2 Aims and measurable Objectives The aims of this project are as follows and as described beneath; � � � � � � � � � �
Create a realistic environment Model a Human Create the Human Animations Importing Models into OpenGL Collision detection Animals modelled and animated Human and Animals moving about Human behaviour Events Include background sound
Creating the environment, the human model and its animations were the important first few aims as then there is a model of the human to work with and an environment in which to place the human. There is just one human model to save on loading in many human models. The environment includes trees and lamps. This is followed by the importing of the model and its animations, which is very important as without the importing the project could not come together. The next few aims were to get the humans walking around the environment and to then apply collision detection on the walls of the environment and also with each other, so they do not walk through walls or each other. The next aims were to create the animals with their animations in 3dsmax and to then introduce them to the stimulation so the humans have animals to react to. 5
This involved getting the animals to move about their enclosures, making sure they are limited to moving about their enclosures. The next aim for the project was to get the humans to react to the different events and animals in the zoo in a realistic way. The other aims for the project were to include events such as, rain and the humans leaving the Zoo at the certain time into the simulation. This means the humans have additional events to react. Adding sound to the simulation was another aim which makes the simulation feel more realistic for the user. 1.3 Resources used Visual Studio.net has been used to program the environment and to bring all the pieces of the project together to create the final simulation. 3dsmax has been used to create the animals and humans and their animations. Research has been done to how the different types of animals move and behave as well as looking into how humans move when put in different situations. Multisequence is a program used to merge many different sounds into one .wav file. This has been used to add dolphin, penguin, flamingo and zebra sounds to a general crowd sound.
6
2 Literature survey 2.0 Project Background To obtain an understanding of some of the work which has already been done on the topic of human simulation, background reading was carried out. This helped to gain a better understanding of the different ways of approaching the simulation, which have been carried out in the past. 2.1 Overview of Simulating Human Behaviour There are some issues which need to be considered when simulating human behaviour. Work has been done in the field of Artificial Intelligence, which provides this project with more scope and background knowledge. Simulating simple collision avoidance for the humans in the zoo needed to be considered when programming the actions. There have been different approaches to this issue which have been covered, which are to be discussed later on in section 2.2 of this report. The issue of how realistic the actions look also needed to be taken into account, as there are different ways in which to go about animating the models. 2.2 Artificial Intelligence, Collision Detection and Collision Avoidance For collision avoidance to work to its full potential; a certain amount of artificial intelligence (AI) must be programmed because the humans need to have a certain amount of intelligence to actually avoid collisions, this is discussed in section 2.2.3. The extent of how the humans will behave to each other in the Zoo project needed to be decided upon. The simulation will only be able to do very simple amount of AI if any at all as no prior knowledge of AI has been studied for this project. The research into AI provides some background to how humans actually behave when confronted with each other. 2.2.1 Artificial Intelligence Some simulations of crowd behaviour have gone into depth about the way in which the humans move and react to each other [Musse, 1997]. Musse and Thalmann have gone into depth about applying rules to the humans which they must obey and when they cannot complete one rule successfully they must follow another set of rules which will enable the humans to reach their overall target successfully. Human grouping in crowd simulations has been previously modelled with the idea that the group of humans will share a general behaviour. The inclusion of relationships between humans has been studied and put into this model, these relationships will in turn influence the response to each other in the simulation. 2.2.2 Collision Detection To ensure realism in the simulation, collision detection needs to be included so that the humans do not walk into each other. The best way to go about detecting collision is to split up the world into blocks and the object can test for collision with the surrounding blocks in each direction [Edenwaith, 2003]. This way is a more efficient way of collision detection than testing against every other object in the world. This is especially efficient in a world with a lot of objects which are moving about. This is more efficient due to the use of 2D sort and it reduces the n in O(n2). If 7
the collision is tested for every object in the environment the O(n2) will be greater due to more calculations done. But if the testing is done via blocks then the n value will be reduced. Collision detection only needs to be tested in 2D for the project, as the human objects which move around do not move vertically; therefore it would be unnecessary to calculate collision detection along an axis which is not going to be used. The paper ‘Collision Detection’ [Edenwaith, 2003], describes a technique of calculating collision detection which involves using spheres. The idea is to put a bounding sphere around the object which is moving. Then from this sphere, test from the centre of the object plus the radius of the bounding sphere and if the position of this is the same as another object (or the distance between them is equal to zero), then a relevant response will occur. Another way is to perform a response when the sign of the distance changes, i.e. from positive to negative. This will work better, as if the object is moving at a high speed the collision detection might not always work.
Figure 1: Bounding spheres showing a collision. 2.2.3 Collision Avoidance Different types of collision avoidance are described in the Musse and Thalmann paper [Musse, 1997]. One type of avoidance is for one of the humans to stop and let the other walk past, and then this human can continue, this having the flaw of the humans deciding which one should stop and let the other pass in collinear situations. The other type of collision avoidance discussed [Musse, 1997], is the change in direction of the humans, so passing without collision, and then returning to the original path to the goal. To avoid calculating and performing unnecessary collision avoidance, the idea of only carrying out collision avoidance on humans within a specific range from the viewer is used. This means time is saved as the computer does not need to calculate every collision in the simulation, but still gives the appearance to the viewer that it is still happening. This idea is a good way of ensuring unnecessary calculations are not carried out and makes the simulation as efficient as possible; this will be considered when performing operations such as collision detection. The psychology-based paper written by Rymill and Dodgson [Rymill, 2005], details the different types of collision which can occur in a crowd simulation. When a human is travelling in the same direction as another, by positioning itself to the left or right, an assessment of the possible collisions up ahead can be determined. This makes the choice of overtaking at certain points more efficient. The 3 different types of collisions described in the paper [Rymill, 2005], are called ‘Towards’, ‘Away’ and ‘Glancing’. ‘Towards’ collision, is where the humans are moving towards each other and can either change their speed, the direction, or both to avoid collision. The ‘Away’ collision is when the humans are moving in the same direction, but the collidee is moving faster. This gives two options, to either slow down to the speed of the other human or to overtake. The ‘Glancing’ collision is where the paths of two humans cross, which uses the same reactions as the ‘Towards’ collision, but if no successful result is seen then the human is forced to stop and wait 8
for the other to pass. With all of these types of collision the human will rejoin its original path once the particular action has been carried out. With this study of collision the background knowledge of what types of reactions are possible in the event of two humans colliding. This gives an insight into the way in which humans behave when wanting to reach a certain destination. 2.3 Character Animation To successfully animate a character some ideas needed to be researched to get an idea of the best way to animate the models. Some factors need to be addressed when animating a character mesh. The mesh needs to be easy to move about and it needs to have realistic motions. 2.3.1 Vertex / Skeleton Animations There are two ways of animating a mesh and these are known as the Vertex method and the Skeleton method. The vertex animation consists of moving the vertices, so at each key frame the vertices are moved to where they need to be for the character to be animated. There is one major problem with this type of animation, which is due to the mesh deforming so the limbs shrink. This is due to the fact there is no structure to the mesh and the curved trajectory of the limb is ignored during the interpolation stage [Laycock, Lapeer 2005]. By using a skeletal structure this takes away the problem of the mesh deforming as the skeletal is implemented by first creating the skeleton, and then attaching the vertices of the mesh to the corresponding bone or bones. By animating the skeleton the mesh cannot deform as the bone is a rigid structure and has a proper structure with limbs [Laycock, Lapeer 2005]. The skeletal structure of a human is shown below in Figure 2. The left drawing shows the character, the middle structure is the hierarchical structure which shows the joints of the human structure in the left drawing. The right drawing is the tree structure of all the links in the body of the character. The node with the X is known as the root node, and it is this node which position is known by the global coordinate system. The position of the other nodes in the hierarchy are relative to the root node. The nodes store the translation and rotation information for the links.
Figure 2: Skeletal Structure of an articulated Object.
Neither of these methods have any form of collision between parts of the mesh whilst animating the model. This means that care must be taken when animating these models so that the mesh does not pass through another part of the mesh, for example the arm passing through the torso. 9
2.3.2 Making the animations realistic To get a better idea of how to go about doing the animations research was done to see what had been looked at in the past. The character animation article by Michael Comet [Comet, 2002] describes how to effectively animate actions that a character performs. So for a human to successfully perform an action there must be emotion behind what the human is doing. If the human is a child then the actions will be slightly more exaggerated and energetic to those of an adult. Also the way in which the actions are performed, so when the humans clap the speed of the clapping needs to be faster depending on happiness and enjoyment. To make the actions as realistic as possible the actions need to be smooth and relaxed and not be too rushed or symmetrical. Actions which are symmetrical look fake and false, as in the real world actions are not performed with exact symmetry. The build up of the action needs to provide some anticipation and the follow through after the action is just as important to make the action as realistic as possible. 2.3.3 Motion Capture Motion Capture (also known as MoCap) could be a very useful tool in seeing exactly how humans react to certain situations. This method could be applied by getting people to interact with each other and the movements would be recorded. By looking at these recordings the difference between male and female movements and actions can be observed as well as how people react to being in a crowd of people. MoCap works by attaching sensors to the subjects at the joints and they record the position and the motion of each of the joints. This could also be applied perhaps to animals as well, as for this project the animals motion is also needed to be realistic. [Meta Motion, 2004] 2.4 Level of Detail In the Crowd and Group Simulation paper it discusses the level of detail idea which is if an object is too far away from the viewer then the amount of polygons of the object is reduced [SIGGRAPH, 2004]. So depending on how far away the object is from the viewer then the appropriate level of detail is applied on the object. As stated in S.D. Laycock’s lecture [Laycock, 2005] “no point in rendering many polygons onto the screen if the resulting projection of the object occupies a few pixels”. Also mentioned in the Crowd and Group Simulation paper [SIGGRAPH, 2004], is that with the human body most parts are cylindrical, so this suggests that by applying the change of detail it would be best to use cylinders. One way of changing the level of detail is by applying edge collapses to the object, this involves removing edges from a mesh. To change the level of detail back again the adding of edges is done [Laycock, 2005]. Figure 3 shows an airplane which has different levels of detail. The picture on the left shows the airplane with the lowest level of detail and the right picture shows the greatest level of detail. From left to right it shows how adding edges improves the detail of the object, and from right to left it shows how removing edges changes the level of detail.
10
a)
b)
c)
d)
Figure 3: a) 150 faces, b) 500 faces, c) 1,000 faces, d) Original, 13,546 faces [Hoppe, 2005]
2.5 Impostors Impostors are defined as “… a set of transparent polygons onto which we map meaning opaque images” [SIGGRAPH, 2004]. This is an idea which was considered for some of the humans in the simulation if the simulation was running slowly as this could make the simulation faster than actually producing each of the humans individually. The idea is to exchange the geometry which is some distance away from the viewer in the scene with a 2D image. The lifetime of the impostor depends on 3 different aspects. The first is if the impostor is too close to the viewer as this would make it noticeable that it is a 2D image and not the actual character. The second is if the viewer moves a direction parallel to the impostor and the third is if the viewer moves in a direction which is too perpendicular to the impostor. Both these would view the impostor at a different angle and would mean that the impostor would show that it is not 3D. Ways to calculate when the impostor should be recreated are shown in Stephen Laycock’s lecture on Virtual Environments II [Laycock, 2005]. Also discussed in the Virtual Environments II lecture [Laycock, 2005], billboards which are a type of impostor. With billboards the image is continually facing the viewer no matter what angle it is viewed from. This is useful for things such as smoke, explosions, fire and has also been used for clouds. There is another type of impostor which is also a billboard; this is called an Axial Billboard. This is where the 2D image rotates around its axis, although this can only be used for symmetrical objects like trees for example. The problem with this type of billboard is that if the billboard is viewed from above it would not look like the object at all [Laycock, 2005]. 2.6 Particle systems Particle systems can be used to create many effects for example, fire, explosions and rain. To create a particle system there are many attributes which need to be considered. The initial position needs to be considered so that the effects have somewhere to start. The initial velocity needs to be considered so the speed of the particles falling for example can be known. Also the size, colour, shape, transparency and lifetime also need to be considered so that the right effect is shown [Owen, 2000]. To make the particles move the position of the particles need to be computed. This is done by performing a simple calculation using two factors of the particle system, which are the speed and direction. Another factor which needs to be considered is gravity. The particle system can have an acceleration applied to it like gravity for example. The lifetime of a particle can be defined when the particle reaches a certain position it resets back to its original position. This would mean that the particles will continue to fall for example if it is rain [Owen, 2000].
11
2.7 EXODUS The EXODUS project simulates how humans behave in different situations given a set of predetermined rules. This project spans over many areas including the events which occurred at the World Trade Centre. The project deals with how exactly humans behave when evacuating buildings, aircraft and also boats in panic situations. It has been used to recount the events occurred in tragedies like the WTC and Gustloff and calculate how many people would get out of these situations and compare them with the actual events [EXODUS, 2003]. In the lecture "Simulating the Interaction of Pedestrians with Wayfinding Systems” which is presented by Prof Galea, he talks about a method of human behaviour using a signage system. This works by placing signs throughout the environment and the humans react to these signs when there is an emergency. This is called Visibility Catchment Area (VCA), is it used so that if a human sees the sign in its field of vision then the human will react to that particular sign i.e. an exit sign, shown in Figure 4. The figure shows that when a human is behind a wall they cannot see the sign and it is beyond their VCA of that particular sign. The diagram also shows another human who is not obstructed by a wall and shows that this human can indeed see the sign and can therefore react.
Figure 4: The Visibility Catchment Area of a sign for 2 humans The research they did whilst creating EXODUS was to see how likely the human was to actually see the sign from different angles, shown in Figure 5. This is important as if the sign only just in the human VCA then the human may not recognise the sign as a sign. This may be due to the sign being too small or the human may not be able to see it. So if the human is facing the sign there is a probability of 1 that the sign has been seen but facing at an angle 45% reduces this angle to just over 0.2.
Figure 5: The observation probabilities of signs when viewed by a human 12
2.8 Critical review For the project, the depth in which Musse and Thalmann went into with collision avoidance has not been done as no prior knowledge of Artificial Intelligence is known. Creating groups of humans and applying rules and relationships to each other was unnecessary for this project, as the main idea of the project was to model how the humans move in their reactions graphically, as opposed to how they act. Also the zoo is not big enough to include many groups of people to which to apply group rules and relationships. The idea discussed for collision detection has improved the project as the simulation includes many humans. By breaking down the simulation into blocks it has improved the overall efficiency of the simulation and has also made it easier to implement the human reactions, as the humans go over to the enclosures and react when they are close to the animal enclosures. The research on level of detail could have been useful if a simulation was running slowly. By finding an algorithm to perform this task it would have ensured that the simulation looked consistent, when actually the humans who are furthest away look very basic. Although for this project the simulation was running at a reasonable speed and none of the animation sequences or movements were affected, so everything runs well and this idea was not needed. Section 2.3.1 describes the ideas behind animating a character in terms of its structure. For this project the models use the skeletal idea as this made the animating of the mesh a lot easier and reduced the risk of producing an animation which looks unrealistic due to the shrinking of the mesh. By animating the skeleton and then attaching the mesh to the skeleton it has made the animations as realistic as possible. Care was taken to avoid any parts of the mesh intercepting another part of the mesh. Section 2.3.2 discusses how to make the animations as realistic as possible and was particularly relevant to the project, as this describes some good points to consider when creating the animations for all the characters in the simulation, which is the main basis of the project. However the idea of Mocap cannot be implemented in this project as the project does not have the resources to implement this type of research. Also, to use it on animals would take a great deal of time and might not be possible to do. The ideas of impostors were considered for the project as depending on the amount of humans in the simulation it could have made the process a lot faster and more efficient. The humans can be objects until a certain point away which can be calculated and when the viewer reaches a certain point or views from a different angle, the impostor would change back to the object. Although due to the environment being quite small the idea of impostors for the humans was not implemented. Although if the environment was bigger in size this would definitely be a good idea to implement and, the humans would be impostors which would change depending on the aspects which were mentioned. This idea was implemented in terms of the trees as these are pictures which cross over so they look like trees, although from above they just look like a cross. The houses are also impostors which do not change due to the camera restrictions not allowing the camera to get close. The project includes rain which has been done using a particle system as described in section 2.6. The rain begins from above the simulation and falls vertically down and has speed applied to it. When the rain reaches the ground the rain particles reset themselves back to the original position meaning that it will constantly rain. The ideas discussed in the EXODUS section were useful ideas to implement for this project. This is due to the humans walking around the zoo and reacting to the animals they see. The signage system could have been implemented so that signs located around the zoo ensure the humans 13
know where to find specific animal enclosures. Also it could have been used if a human walks past an animal and notices that they are doing something in which to react to, they do indeed react to it using the VCA idea. Unfortunately these ideas could not be implemented due to the time restrictions.
14
3 Theory / Design 3.1 Initial Approaches The initial approach to the project was to create the basic human models and a simple environment to start with, then the reactions and collision detection could be included. This section describes the ideas planned to be implemented at the design stage, section 4 describes what has been implemented and how. Screenshots of the environment are found in section A of the Appendix. To deal with the modelling of the characters, software needed to be used. There are many different pieces of software which deal with this such as Maya and 3dsmax [3dsmax, 2006]. The decision was made to use 3dsmax as more knowledge of this particular package was known and was more familiar. Also when exporting the models the code which was provided by Paul Gasson was specific to 3dsmax models. It was planned to model the humans and animals in 3dsmax by creating a mesh using splines or a basic polyhedral shape, for example as a cylinder, and then use the different tools in 3dsmax to adjust the shape and to add on other shapes. For example, extrude and bevel, which extrudes parts of the mesh to create, for example, arms and legs. To animate the modelled animals and humans the Key frame and time slider features of 3dsmax were planned to be used to move along to certain frames. Then using the select and rotate or select and move options, the models were animated. The models are simple as it can take up a lot of time modelling the animals and humans models, this meant other parts of the project could be looked at sooner. As suggested in the literature survey in the collision detection section, it was planned to divide the environment into smaller blocks like shown in Figure 6. This meant the humans test for collision against the other humans in the same block and the blocks surrounding it. As shown in Figure 7
Figure 6: The breaking down of the Zoo into block sections
Figure 7: The testing of collision detection with surrounding blocks 15
These blocks are used to reduce the time complexity on the overall collision detection. By ensuring that the collision calculations are only applied where it is necessary it reduces the global O(n2) problem down to just the localised O(n2) problem. For example, with the collision testing with bounding spheres calculation with every other human in the area is costly as the following case would occur. for (int i=0; i<5;i++) { if(i==j){j++} for (int j=0; j<5;j++) { dis = distance between 2 humans if dis < (irad+jrad) * (irad+jrad){reaction} } } But due to the blocks the calculation is only tested when the other human is in the same grid square and those surrounding it as shown below. Adding the extra if statement in the for loop means that if the humans are not near each other then the bounding sphere calculation will not take place. for (int i=0; i<5;i++) { if(i==j){j++} for (int j=0; j<5;j++) { if human[i] same or surrounding grid { dis = distance between 2 humans if dis < (irad+jrad) * (irad+jrad){reaction} } } }
3.2 Animations The project has been designed so that each animal has a few animations which represent their behaviour in this project. This includes walking, standing still, flicking of the tail and many more. To ensure the files which are imported are as small as possible, the animation lengths have been made as short as possible. This also has the benefit of the shorter the animation the easier it is to interrupt the human behaviour. So the human walk animation is of just one full step, as it is for the other animal walk animations. 3.3 Importing models The planning for the importing aim was to export the models by first exporting a copy of the mesh and also a file containing the information for the position of the vertices of that particular model for the animations. These are saved in .amr format which cannot be imported in this form. So by using a converter, which was provided with the importing code by Paul Gasson, these files can be converted to .amo format. This format for the files is then supported for importing into OpenGL by the code also provided by Paul. This code only allowed a single model and animation 16
to be imported, so the code needed to be adapted so that additional models and animations could be added to the simulation. 3.4 Events The project has been designed so that the closing event would occur at approximately 6pm, which is indicated by the clocks in the centre of the zoo. At this closing stage the humans leave the zoo and the gates then close behind them. To make this look realistic it was planned that the colour of the sky will darken showing evening to night time. The other event is which was planned to be included into the simulation was rain which uses a basic particle system holding approximately 5000 particles. Each particle was planned to have a textured polygon which has its x, y, z positions as random. When it starts to rain the particles fall along the y axis and upon reaching the ground the y position of the particles is reassigned back to the top to continue the rain for as long as desired. When it is about to rain the sky turns grey and when it stops the sky returns to its original colour. 3.5 Environment The sky box is a sphere and coloured blue unless there are events which occur in the zoo. These events are either when the zoo closes in which case the sky turns black, and when it rains in which the sky turns grey. There are clouds which rotate around the zoo and disappear from sight when the sky turns to grey for the rain and black for night. To make the environment realistic the dolphin enclosure has a pool sunken down into the ground so the dolphin can dive properly. The top of the pool has a polygon on the top which moves up and down to simulate a very basic water movement. Another way in which the water was planned to be implemented and tested was to use a particle system. This was to be made up of a 2D array of particles which would represent the surface of the water. To gain a realistic motion each particle would move by using sine function. This would therefore give waves along the surface of the water. For the environment to look more realistic the simulation includes foliage, as animals need it as their food and it is generally found in environments. So this involved adding trees and bushes to the environment. For added realism other objects such as lamp posts and benches were also planned to be included. The environment outside the zoo was also intended to be built up so that the zoo looks more convincing and genuine. 3.6 Sound The function sndPlaySound() allows a sound wave in the form of a .wav file to play in OpenGL. This function only allows one sound to be played but there is a loop option so that one sound can be played over and over until the application is ended, SND_LOOP [Flexbeta, 2004]. This function needs MMSystem.h, which enables the sound file to be played. This can be obtained from MSDN website [MSDN, 2006]. 3.7 Collision Section 2.2.2 describes a method of collision detection using bounding spheres. The environment has been designed so that this idea is implemented into the simulation to calculate if there is a collision between humans. As said in the paper “Crowd and Group Simulation”, [SIGGRAPH, 17
2004], a human can be made of cylinders and has a general cylindrical shape. From this we can determine that using bounding spheres may be the best form of collision detection to use. A paper by Musse and Thalmann, discussed in Section 2.2.3, reviews how humans avoid collision. One of the methods is for the human to pause and let the other walk by [Musse, 1997]. This is the method which was planned to be implemented for the avoidance in the simulation. Once a collision between 2 humans has been recognised one of the humans will pause to allow the other human to continue and then once the other human is out of range then the human will continue. The other type of avoidance discussed in the paper, [Musse, 1997], is where the humans look ahead and change their course to avoid collision. This idea was also planned to be implemented into the simulation by allowing the humans to sidestep around each other. These 2 ideas can work by making the bounding sphere bigger than the human so when there is a collision between bounding spheres the humans either sidestep around each other or one human can pause, thus avoiding collision. After the collision has been avoided the humans will then return to their path in which they were travelling. O’Rourke’s line intersection code works out whether a predetermined line and a moving object will intercept. This is done by supplying the coordinates of the start and end point of the line, the position of the object and its velocity in the form of a vector. From this it works out the exact position in which the object collides with the line. This is shown in the Figure 8 below. From here the reaction can be set, so for example if it is a human walking into a wall the human would perhaps stop. [O’Rourke, 2001]
Figure 8: Diagram showing O’Rourke’s line intersection
3.8 Animals and Human Movement Human movement was planned to be implemented by assigning the humans a random destination coordinate and then the humans move to this destination. Once the human has reached this point a new coordinate is assigned to the human. By using the current position and the destination coordinate the movement can be calculated. The next position of the human is calculated by first working out the equation of a line, as shown in Figure 9. The gradient is calculated by dividing the difference in height by the difference in length. From this the equation can be calculated. The x value is increased and the new y value is found using the equation. By doing this the human will walk along the equation of the line until reaching its destination point. If the change in x for 18
example is equal to zero then the human walks along the z axis until reaching the destination coordinate.
Figure 9: Equation of a line. Another idea which was planned to be tested was to use the following equation when moving the humans. Position1 = Position0 + (∆Position . t) Where Position1 represents the next coordinate position of the human, Position0 represents the current coordinate position, t represents a time step and ∆Position represents the change in x and change in z from the destination coordinates and the starting coordinate position. By ensuring t is incremented using equal steps, when calculating the movement, the object will move an equal distance. The animal movement does not need to be as detailed as the human movement as they do not need to move as far. So it was planned that their movement was basic and their movements are determined by using the random function, rand(). The direction in which they move depends on which value is returned from the random function. The animals are confined to their enclosures and have collision detection in their enclosures so they cannot walk out.
19
4 Implementation 4.1 Importing models The importing of the 3dsmax models into the OpenGL environment uses Paul Gasson’s importing code. This code enables one model with one animation to be imported which is good start for the requirements of the project. But as many models were to be imported the code needed to be adapted so that more models can be imported and more animations can be included. This involved adding additional variables to deal with the extra animation sequences and passing the initAvatar() method extra sequences. The sequence of the mesh is then decided upon by a variable called animnumber this variable matches up with the animation sequence defined in myGlutInit() in the main method. So for example if the initial sequence of the giraffe is walking which is held by animnumber as 1, and then the animnumber is then changed to become 2, which holds the sequence of swishing its tail, the giraffe will then change to do this sequence. After these changes multiple models and animations are now included. The basic code and the macroscripts for this were not available until mid January. 4.2 Animations To find out exactly how animals walk or move some research has gone into how exactly they move. For example, a spider has 8 legs so to find out how exactly they move in terms of what legs move when a walk cycle was found [Hash, 2006]. This was helpful to have when moving the legs as the exact position of the legs are stated at a single point in time. Research has also been done to find out how the giraffe walks as it not as simple as just moving the legs. The head and tail move as well to aid in balance this is also like the zebra. A penguin moves differently to the other animals so penguin videos have been studied to get the penguins walking as realistic as possible. The videos which have been studied are listed as links in Appendix A. To create an animation sequence a model of the character and a bone structure was implemented. Due to the time restrictions some of the models have been taken from the courseware website for the unit ‘Animation, Virtual Environments and Games Development’ [Courseware, 2006]. Although the models have been taken from this website all the animations and the bone structures have not been taken from anywhere and have been implemented from nothing. It was possible for two models to be completely modelled from scratch, the human and the penguin. These models have been implemented by using polygons and some of the features within 3dsmax to model. 4.2.1 Creating the Models The human was modelled by first creating cylinders for the main body, arms and legs. From here the vertices of the cylinders were adapted to ensure the model looked more realistic. These were then all attached together to form one mesh object. The shoes of the human were modelled by adapting a cube and the head was implemented using a sphere and adapting the vertices to create the facial features. The hair was modelled by adapting a cylinder. The hands were modelled so that they were very basic and were implemented by using adapted cylinders. All the parts of the human needed to be attached together to form one mesh as exporting only allowed one mesh object to be exported.
20
Figure 10: Human Model The penguin was created slightly differently to the human using different tools in 3dsmax. The penguin is a general bottle shape so by using splines half of the main shape was drawn from top to bottom. By using the modifier Lathe this spline was converted from a 2D line to a 3D object by rotating the spline around the vertical axis. This created the main body and from here the arms were extruded from the body. The feet were creating by using splines and extruding to make them 3D and the beak was implemented by adapting a cube. The eyes and stomach were modelled using adapted spheres. As with the human all the parts of the body were attached together to form one complete mesh. The models were textured using bitmaps through the material editor.
Figure 11: Penguin Model 4.2.2 Creating the skeletal structures The skeletal structure was built for all the animated models in the zoo by placing bones in the correct positions in the mesh using the bone tool in 3dsmax. From here the bones could then be moved using IK solvers and dummy objects. IK or Inverse Kinematics solvers allow a collection of bones to be moved depending on where the crosshair is moved. These allow realistic movement for the bones and in particular the legs. By applying an IK solver to the legs, connecting from the thigh bone to the foot bone, depending on where the cross hair is positioned 21
the legs bend accordingly. These IK solvers are placed throughout the bone structure to allow maximum movement. By applying dummy objects to the structure it allows the IK solvers to move a lot easier. These dummy objects are placed over the IK solvers and are then attached to each other so when the dummy object moves the IK solver moves along with it thus moving the bones. By then linking dummy objects together the structure can be moved about more realistically. This is due to when a human bends forward all the bones in the arms and spine move applying the same rotations. If spine was moved without linking these dummy objects together the arm dummy would not move. This would cause the bone structure to be stretched in an unrealistic way and would then involve moving the arm and wrist dummy objects to counteract these movements. By linking the dummy objects the animation of the structure is much simpler.
Figure 12: Human model showing the skeletal structure with IK solvers and Dummy points
4.2.3 Animating Once the skeletal structure and the mesh were completed the next step was to attach them together so that when the bones moved so did the relevant vertices of the mesh. This involved using the Skin modifier in 3dsmax. The skin modifier uses envelopes which are areas around each bone containing part of the mesh. Adapting these envelopes ensured every vertex was attached to at least one bone, thus when moving the bone all the vertices assigned to the moving bones would also move. The animations for the models are then implemented by using key frames. By moving the dummy points to different positions and recording the positions in the key frames when the animation is played back the model moves between the key frames. Interpolation is used to determine the positions of the model vertices in between these key-frames. 4.3 Events There are two events which have been implemented into the simulation to which the humans can react. These events are included to give additional options for the human behaviour. The two events included are rain and the closing event.
22
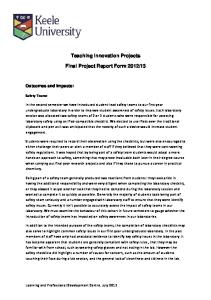
4.3.1 Rain The rain has been implemented as said in the design. The class rain holds the structure of each rain particle. The particle is defined by what it looks like, i.e. whether it is a line or a textured polygon, and its position. There are 3000 particles which are in an array. A for loop goes through the array and randomly assigns an x, y and z coordinate, so each particle in the array has its location. These points are random so that the rain looks as realistic as possible as rain falls from random positions. When it starts to rain the rain particles fall along the y axis and when a particle reaches the ground its y position is reassigned to its original position and once again falls along the y axis. This gives the illusion of constant rain fall and means that the least possible amount of particles are used. This is done whilst the rain Boolean value is true, once the value is set to false the rain stops. The colour of the sky also changes during this rain event. When it is about to rain the sky turns grey to simulate complete cloud cover and when the rain stops the sky turns back to its original colour. Testing to see whether the particles would be lines or made as polygons to see which is more realistic was done at this stage. The results are documented in the testing and results section later on in the report. 4.3.2 Closing Event The closing event occurs at 5:45pm, and the sky turns dark to represent night time. Once the zoo event begins the humans react to this by leaving the zoo and then the doors to the zoo close at approximately 6pm. The clocks work by having 2 polygons in the shape of clock hands. The minute hand moves by rotating around the centre point of the clock by an angle. Once the angle gets to a certain point the hour hand will move. If the clock face is split up into 12 parts for each hour point each hour point is at the angle of 360 / 12, which results as 30. Each movement of the minute hand will move at an angle of 360 / 60 so therefore 6 degrees. The hour hands move whenever the minute hand gets to 15, 30, 45 and 60 minutes past the hour (i.e. 0, 90,180 and 270 degrees), therefore the hands move in increments of 7.5 degrees. The clock is shown in the Figure 13 below.
Figure 13: Screenshot of the clock 4.4 Environment The environment is just as important as the actual human behaviour as the humans need somewhere to move about, and the environment ensures the simulation looks as realistic as possible. Without the environment the simulation would not have the same effect, as when the humans leave the zoo for example the user would not be able to see them walking out of the gates without the environment. 23
4.4.1 Inside the Zoo To make the dolphin enclosure look slightly more realistic the pool has been sunken into the ground. There is a polygon near the top of the pool which moves vertically up and down to give a slightly more realistic look to the pool, as when the dolphin moves about the water does not remain still on the surface. This simulates a basic movement of the water to the dolphin moving. A particle system for the water was decided against as this would slow down the simulation due to the many particles and there was not enough time to investigate further.
Figure 14: Dolphin pool sunken into the ground 4.4.2 Outside the zoo The environment outside the zoo has been thought of and to make this part of the simulation look good pictures of buildings, trees and houses have been included so actual buildings and houses do not need to be created and many trees do not need to be displayed. This uses the idea of impostors discussed in section 2.5 as the buildings and houses are just pictures they are not the complete models. Due to the camera movement restrictions (section 4.8.3) the camera will not get close enough to the pictures to require the actual models. A road leading up to the zoo and a car model have also been included for added authenticity.
Figure 15: Environment outside the zoo
24
The environment has clouds which rotate about the zoo to give added realism to the environment. This has been implemented using the idea of impostors using a picture of a cloud as the camera does not reach the point where the user would recognise the cloud as a textured polygon. There are 8 pictures of clouds, 4 which rotate around the vertical (Y) axis, and 4 which rotate about the X axis. Each of the cloud positions are updated as time goes on so that they move. The angles of each of the clouds rotating about the environment are decreased by a constant value.
Figure 16: Screenshot which show the clouds
4.4.3 Foliage
Figure 17: Screenshot showing the trees and bushes in the environment
The trees and bushes inside the zoo are made using 2 polygons which cross over in the middle which have a tree textured applied to them. The trees and bushes take the form of objects in the simulation and the x, y, z position are applied to them. An array stores these positions of many 25
trees and bushes so that when they are drawn in the display function, a ‘for’ loop is used to go through the array displaying a tree at the positions specified in the array. This is shown in the code below. This code shows the for loop going through the array trees[], which is of length 8. The tree is translated to the positioned defined in the array, by using the getXpos()and getZpos() methods in the Object class. for (int i=0; i<8; i++) { glPushMatrix();//trees glTranslatef(trees[i]->getXpos(),0,trees[i]->getZpos()); glEnable(GL_ALPHA_TEST); glAlphaFunc(GL_GREATER,0.1f); glEnable(GL_TEXTURE_2D); glBindTexture(GL_TEXTURE_2D, texName[9]); object->trees(); glDisable(GL_TEXTURE_2D); glDisable(GL_ALPHA_TEST); glPopMatrix(); }
4.5 Sound char* WAV = "\Sounds\\zoo.wav"; sndPlaySound(WAV,SND_ASYNC|SND_LOOP); return 0;
The sound for this project has been implemented using the information discussed in section 3.4. The sndPlaySound() function has been used to allow a single sound file (.wav) to play along side the simulation. The SND_LOOP command which is passed into the function allows the sound to be played continually. The SND_ASYNC command which is the other command passed into the function ensures that the sound file plays in asynchronous mode. This means that the sound will be played alongside what is happening in the simulation instead of just playing the sound over and over and nothing else happening. The sound file is a combination of human background noise [Human, 2006], dolphin, zebra, flamingo and penguin [Duindam, 2006]. By using the software Multisequence it was possible to successfully create one sound file which included all these sounds. The multiple track option in this software allowed each file to be loaded into separate tracks along the same time line. Multisequence then allows these tracks to be saved as one audio file (.wav) [Multisequence, 2006]. 4.6 Behaviour Implemented The behaviour is one of the most important factors of the project. This part of section 4 describes the implementation of the animation sequences in different situations in the simulation. 4.6.1 Walking The humans begin by walking around the zoo, as described in the next section, so the first animation sequence of the humans which was implemented was the walking sequence. This is also the sequence which is most used as to walk around the zoo properly walking is required. So the first rule which is implemented into the simulation is that whilst the human is moving along the axis then the sequence of the humans walking must be the walking sequence. The example 26
below shows the human walking animation assigned to the variable, animfilename. This is passed to avex.h, which is part of the importer code, which applies the file to mesh in the environment. strcpy(animfilename,"Models\\humanwalk.amo"); 4.6.2 Standing at Enclosures The decision whether the human walks over to the enclosure is decided upon using the random function, rand(). By using this method the value returned from this function can then decide which point to go to around the enclosures close to where the human is located. The options for these are to either go to the point specified or to remain walking around the path which they are on. Once a human walks to a point just outside the enclosure to look at one of the animals his/her status changes so that he/she is stationary and therefore the still animation sequence option is used. All the sequences are defined in the myGlutInit()method, when the animation sequence of the model needs to change to another sequence a different file is applied to the mesh. Whilst the human status is stationary, a different random number is used to determine whether the human remains still watching the animal in the enclosure or to change to move around one of the paths around the zoo. By using these ideas the movements of the humans about the zoo are random and give a certain amount of freedom for the models. The other situation in which the humans are in is to be standing still looking at something. For this situation the human could be doing one out of a few actions which is possible in this case. They could be clapping at the dolphin doing tricks or pointing at an animal. The humans will walk over to the enclosure and the next rule which was implemented is that whilst the human is standing at the edge of the enclosure the sequence will be the human standing still, representing a human watching an animal. If the animal is walking about the enclosure then the human has a certain chance of pointing at the animal. This is decided using a random number. There is half a chance the human will point and half a chance the human will remain watching the animal. So therefore if the result from the random number function, rand(), is in the first half of the possible numbers returned, the human will remain still and the other half the human will point. The other action in which the humans can do is the clapping action. This is if something impressive happens in the zoo like a show. The only part of the zoo in which there is a show happening is in the dolphin section. So if the human is positioned at the edge of the dolphin enclosure then there is a possibility the human will clap. So the clapping can occur with the still and pointing sequences. As this part is the dolphin show there is more of a chance of the humans clapping than just sitting completely still so therefore the chance of this sequence coming up in this situation is greater. This is the same with the pointing sequence. So instead of the probabilities being exactly half and half the results are split into different values. 4.6.3 Bumping into each other The other type of behaviour implemented is what happens when the humans are about to bump into each other. When two people are about to walk into each other one of the reactions humans make is to have one human pause and let the other person continue and then once that person is no longer in the way then the other person continues. This method of collision has been implemented into the simulation. Whilst the first person is still the still animation sequence is then used, and once the human starts walking the sequence switches back to the walking sequence. 27
4.6.4 Animals The animals move about their enclosures as described in section 4.7. But whilst the animals are walking their animation sequence is their walking animation. The random numbers which determine whether the animals walk or remain still also define which animation sequence is enforced at a particular time. For example if the penguin is moving then the animation for the penguin is the walking animation. When the penguin remains still its animation sequence is still. The still animations are defined by 1 frame of the animals not moving. 4.7 Animals and Human Movement The humans use a series of paths to walk about the zoo. These paths are in the form of arrays which store coordinates of the points in which the humans walk to for a particular path. So for example one path implemented is a path which involves a human walking around the centre building so the array stores coordinates which the humans walk to which shows the humans walking around the building. The humans start off by walking to the first point in the array, by assigning the point in the array as their destination point. The humans then know to walk to the destination coordinate and once they reach this point the next point in the array is then assigned to the destination coordinates of the human and so on until the end of the array. The below example shows the destination coordinates assigned to whatever the position is in the array. When the human reaches the destination coordinate its step number is incremented so that the next coordinate is used. Peoples[i].setdestinationX(path1[step[i]][0]); Peoples[i].setdestinationZ(path1[step[i]][1]);
Once the humans have come to the end of one path the next path is then chosen. This is done by using the random function, rand(), and the result from this will then assign the human the next path. This can involve going around the same path again. When the human reaches the end of the path step[i] is reset back to zero so that when the next path starts the destination coordinates start from the beginning of the array. pathDecide = rand()%20+1; if ((pathDecide >=1) &&(pathDecide<5)){Peoples[i].setpath(2);step[i]=0; } if ((pathDecide >5) &&(pathDecide<50)){Peoples[i].setpath(3);step[i]=0; }
If the zoo closes or the rain event occurs then the humans will follow the path which leaves the zoo. If the event which leads to the humans leaving the zoo is rain and the rain stops the humans will walk back into the zoo. The animal movement has been applied using the random function. The random function calculates a random number and this value is used to determine which direction the animals will walk in. If the random numbers are between 1 and 201 for example, by splitting this range into smaller ranges the direction in which they will move is determined. if ((change2>=1)&&(change2<50)){move=true; penAngle=270; penanimnumber=1;} if (penAngle==270){penZ=penZ+1.2;}
So for example if the result is between 1 and 50 then the animal will walk along the z axis in the positive direction. There is also a range of results returned which will mean the animals will stand still as the animals in an enclosure are not constantly walking around. Thought has been put into how likely the animals will do certain actions. So the range of values which results in the animal standing still is greater than the other so it is more likely that the animal is stationary. During 28
these movements depending on whether the animal is still or walking the corresponding animations will take place as an animal will not walk on the spot. 4.8 Collision Without collision implemented into the project the humans would walk through each other and the animals would walk all over the environment, despite the fences surrounding the enclosures. 4.8.1 Animal The animals have a very basic collision detection applied which ensures they do not leave their enclosures. They have a square area in which they can move about in, which is described above in section 4.6. If the animals should try to go outside this square then the value of their position can not go any further. This means the animal cannot go any further in that particular direction and therefore cannot go outside the fence. This is a much more efficient way of applying collision detection on the animals than using O’Rourke’s line intersection code as not so many calculations need to be done. This collision is simple due to the human behaviour requiring more calculations applied to them to move properly and detect collision. So by ensuring that the animal collision is simple the human’s reactions will not be slowed down as much, thus making the simulation more efficient. 4.8.2 Human The human collision involves assigning a grid structure to each of the humans. The zoo environment is split into squares so depending on where the human is located depends on what X and Z grid square they are in. These grid references for each human then keep track of where they are and makes collision detection much more efficient. By applying an ‘if’ statement to say that if the current human has the same grid square than another human in the zoo then test for collision. This is also the case if the other human is in a square which is surrounding the square which the human is in. If the humans then have a possible collision after going through these steps then the next step is to then test one human, i, with the other human, j, using bounding spheres. This has been implemented as described in section 2.2, if the distance between the two bounding spheres is less than the sum of the radii of the bounding spheres then there is a collision. Once there has been a collision the human, j, pauses and lets the other human continue until it is out of range and then the human, j, can continue. The collision is dealt with differently if the human, i, is stationary and therefore causing the human, j, to stop. This would mean that the i human is stuck. So in this case the j human walks around the stationary human and then continues along its path. 4.8.3 Camera The camera has a basic collision detection applied to it to stop the camera flying out side the virtual environment. This has been implemented so that if the y coordinate value is less than zero (the ground) then the y coordinate value is set to zero, thus stopping the camera. The same principle has been applied to that the camera can not fall off the world or fly up too far. 4.9 Problems There have been some problems which have occurred during the implementation stage. One of the problems which occurred was due to the way in which the humans were moving along the equation of a line. Although most of the time the humans did indeed walk along the line of the equation there were times where there were unexplainable jumping where the human would be in one position and then suddenly appear in a different part of the zoo. The initial thought to this 29
might have been due to the gradient of the equations becoming too big in cases for example where the human coordinates are (10, 10) and the destination coordinates are (20,100). This would return a value of 10 for the gradient and would result in jumping as the next step would be the x coordinate multiplied by this value meaning a big gap. This was then dealt with by applying a rule saying that if the gradient is outside of a certain range then reassign a new destination. But this did not fix the problem so a new method of human motion had to be implemented. 4.10 Rejected Method This new method, described in section 3.8, uses a different equation to find the next position of the human, using increments of t (representing time). This method takes the change in coordinate values from the destination coordinates and the human starting position and multiplies this by the time. This value is then added to the current position of the human thus finding the next step. There are some problems with this method as depending on how far away the destination coordinate was to the current position there were some big jumps in the movement. This meant that the time had to be reduced, but this also meant some unrealistic movement occurred as some humans would walk very slow to destinations close to them and would also mean that if the destination was distant the humans would walk faster in an unrealistic way. See section 4.11 for the final solution. This idea was rejected as there was not enough time to investigate the problems due to the time restrictions and the method described in section 4.11 was already implemented and working to some degree. 4.11 Final Solution - Paths To allow the humans to move about arrays containing coordinates have been implemented. These arrays hold paths in which the humans can take whilst moving about the zoo. As they are set paths this takes away the movement and warping problems described in section 4.9 and 4.10. This is due to the testing of these paths would show any problems in the testing stage which can then be fixed and therefore allowing the humans to move without any issues. The method, in which the paths get decided, is based on either what is happening around them (rain or closing event), or on a random number. The random number still gives the humans some degree of ‘freedom’ to walk about the zoo arbitrarily. The coordinates stored in the array are assigned to the human destination coordinates and then human then moves the destination coordinate and upon reaching this destination the next coordinate in the array is assigned to the human. If the human reaches the last destination coordinate in the current path array, then this human will be randomly assigned a new path and then this process can be repeated using the coordinates stored in the new array. If an event such as rain or closing time should occur then all the humans are assigned the path which leads outside the zoo. If the rain should stop then the path leading into the zoo will be assigned to the humans so that they can go back into the zoo. Figure 18, shown below, shows the zoo from above with 4 coloured routes marked on it. These 4 colours represent possible paths which the humans can use.
30
Figure 18: Overhead view of the zoo showing paths
31
5 Testing and Results 5.1 Collision The collision detection in the zoo works efficiently as the grid structure tests for collision when one human is in either the same or a surrounding grid as another human. The collision does not test between humans who are located in opposite sides of the zoo. If there is a collision one of the humans stops whilst the other continues walking. If one of the humans is stationary the walking human walks around this human by walking around this stationary human. 5.2 Behaviour and Animation Sequences When it rains in the simulation the humans should react to the rain by leaving the zoo. This is in fact what occurs in the simulation, when it does rain the humans path changes to the path which leaves the zoo and they successfully leave the zoo as shown in the Figure 19 below. The humans complete their current path before deciding to leave the zoo. The screenshot shows the humans walking out of the zoo and the sky has successfully changed to grey to help to make the rain situation more realistic. The humans walk off down the road and once they reach the end of the path which leads them out of the zoo, the humans stand around waiting for the rain to stop. Once the rain stops the humans path changes to the path which leads them back in the zoo. Also when the rain stops the sky turns blue and the clouds appear again.
Figure 19: Screenshot showing the sky grey, the rain and the humans leaving the zoo.
The humans are also required to leave the zoo when it is the zoo closing time and the sky turns dark to represent night time. This works successfully in the simulation as at the time of 5:45pm the humans walk out of the zoo and the sky gets darker and darker until it the result is black. This is shown in the Figure 20 below. The gates close at 6pm which gives the humans time to leave the zoo.
32
Figure 20: Screenshot showing the humans leaving the zoo at closing time 5:45pm
The humans walk about the zoo via paths, but if they go to an enclosure or decide to watch the spider for example then there is a change in their behaviour. If a human is standing by an enclosure first the human recognises if it is the dolphin enclosure or not. If it is not then the human will have one of 2 possible reactions, which are to stand still and watch the animal or to point. But if the enclosure the human is at is the dolphin enclosure then there is an additional sequence which is to clap. This is due to the dolphin doing tricks and putting on a show for the humans. So therefore humans watching the dolphin dive etc will clap. If a human does not go over to an enclosure it will walk along one of the paths. If the path leads into the building where the chameleon and the spider are, then the options are for the human to either keep on walking or to stop and look at these. This behaviour of the human is represented by the diagram in Figure 21.
Figure 21: The human situations and the sequences
The sequences changes all work well in the environment and the animation sequences for the humans change when they are supposed to. The animation lengths have been made as short as possible so that if they need to react to the environment they do so with as little delay as possible. The animal sequences change depending on what they are doing in the environment. If they are walking about the enclosure the sequence is set to walk but if they remain still then their sequence changes from walking to a still sequence which has an animation length of 1 frame. 33
5.3 Human and Animal Movement This section describes how the animals and humans move about in the environment. 5.3.1 Human Due to the issues discussed in the problems section, 4.9 and 4.10, a new method needed to be enforced for the human movements due to the jumping problems. This resulted in a method using paths. There are a certain number of paths which are defined as the coordinates of the points in the path stored as arrays. The human’s destination points are assigned to the humans depending on what path they have been assigned. There are 3 paths in total, including the path which defines how the humans enter and leave the zoo, the movement around the centre building and also the path which involved moving through the centre building. Each human is assigned a different radius which defines their visibility catchment area, if their position plus the radii comes into contact with an animal area they will go to a point about the enclosure, watch and react to whatever the animal is doing. The different radii, represents the different attention span of the humans. The probability of the humans going over to the animal enclosure will be defined by the random function. If the result is in a certain range then they will go investigate the animal and if not then they shall continue along the path which has been assigned to them. This means there is no longer a need for the O’Rourke line intersection tests as the humans will not try to cross the fences as they are on predetermined paths. But the bounding spheres collision idea is still used to calculate collision between the humans on the paths. If the humans collide then one human will pause whilst the other moves in front. The paths implemented work well and cover the general paths about the zoo. There are two paths which move about the zoo and two paths which lead in and out of the zoo. The decision on what path to walk along is determined by the random number function and works well for variation between the humans so they do not take all take the same path all the time. The change between paths is smooth there is no jumping between points. When the decision is made for a certain human to walk to or away from an enclosure the transaction between stationary points and paths are smooth. The initial movement of the humans about the zoo was very fast meaning that the user could not see what reactions the humans were doing as the humans did not stay stationary for long at all. This was fixed by adapting the random number ranges which decide whether the human remains stationary next to an enclosure or moves about the zoo again. Increasing the range for the human to remain stationary meant that the stationary action is more likely to occur and therefore the humans stay stationary for longer. 5.3.2 Animal The animal movement works well as they do not need to move far therefore their movements are not as complicated and in depth as the humans. The animals walk around their enclosures using the random number function and they do not walk out of their enclosures. 5.4 O’Rourke’s Line Intersection Due to the changes in human movement O’Rourke’s line intersection method was not implemented into the simulation. This was because the human movement is defined by paths. These paths do not cross over fences or through walls therefore this method would not be used. If
34
the project was extended to ensure the human movements were not confined to their paths but have unlimited movement, the O’Rourke method would be implemented. 5.5 Rain The rain particles were testing with as the raindrops as lines and polygons to test which method looked more realistic. The textured polygon method could hardly be seen when implemented meaning that the viewer would not be able to see when it rains. It could only be seen against a white background. Whereas the GL_LINES method was tested and this method is much better as the lines are more visible and it meant that not as many particles needed to be used. The original 5000 particles could be reduced to 3000 particles without losing any realism. Therefore for this project the rain will use the GL_LINES method. The results of both methods are shown below in Figures 22 and 23.
Figure 22: Textured Polygon
Figure 23: Using GL_LINES 35
6 Conclusion 6.1 Success of project Overall the project was a success as all of the aims were met. The overall environment includes a lot of features including trees, bushes and a road. This satisfies the aim of creating the environment and making it look realistic. One basic human model and its animations were successfully modelled in 3dsmax, ensuring that the aims to model the human and to create the human animations were completed. An animal model was successfully modelled and animated in 3dsmax which satisfies the aim for modelling an animal. Due to the time restrictions the other humans could not be modelled and so therefore were borrowed [Courseware, 2006]. But the animations were done from scratch so still therefore satisfying the aim. The code for importing models was successfully adapted so that multiple models and animations could be included into OpenGL. This meant that the aim for getting the models imported was successfully completed. Another one of the aims of the project was to include background sound to make the environment more realistic for the user. This was completed successfully including sounds of the animals and humans put together all in one sound. This is looped so that there is a constant sound throughout the simulation. Another aim was to include events to which the humans can react. These included rain and the close event. The rain successfully works when the user presses the V button to allow it to rain. The particles fall properly along the vertical axis and reset when they reach the ground. The rain is continuous and it is not noticeable at all when the particles reset. The other event is the close event which occurs when the zoo closes. This involves the humans successfully leaving the zoo and the sky successfully changing colour. These successfully complete the event aim. The animals successfully move about their enclosures and do not walk outside their boundaries. The aim for getting the animals to move about is successfully completed. The humans successfully move about the zoo along the paths to which they are assigned. There are not any problems with warping or jumping so therefore the aim for the human movement is successfully completed. The collision detection has two different types of response. The first response is one of the humans pausing to allow the other to continue and once the human is out of the way then the other human can continue. The other type of response is if the one human walks into the way of another human who is stationary, where the moving human walks around the stationary human. The humans successfully change animation sequences when they are watching the animals in their enclosures. When the humans see something like the dolphin jumping they change their animation sequences to simulate behaviour. The humans walk around the specified paths and if the humans walk past an animal and they then have the decision to walk over to the enclosure or they carry on walking along the path. This simulates random human behaviour. This satisfies the aim to implement the human behaviour. With all of the aims for the project successfully completed, as stated, the project was an overall success.
36
6.2 Management of the project The implementation stages followed a slightly different structure to that of the original work plan, as shown in Section E in the Appendix. The diagram shows the original work plan along with what actually happened. It shows that some of the aims and tasks were not implemented when initially intended. The environment was the first thing to be implemented but was developed over the course of the project by constantly reviewing what had already been implemented. Then, if necessary, include more features to ensure the environment looked as realistic as possible. The importing of the models could not happen during the stage initially planned due to the release of the importing code and macroscripts, provided by Paul Gasson, were not available until early January. Due to this the work plan needed to be restructured to get the other aims completed whilst waiting. The importing code needed to be adapted so was not ready to use straight away for multiple models. The model movements and the collision detection were not implemented during the times indicated in the original plan due to the importer not being available when originally expected and the focus of the project was on getting the models and their animations completed. The closing event and the rain were implemented much earlier than originally planned due to extra time which would have been used to look at the importing code. Doing these aims earlier meant that there was more time after the code became available to import the models, animations and to code the behaviour. Adapting the work plan as the project progresses means that any problems that occur whilst implementing parts of the project can be adjusted for. This means the project has more potential for being successful and is a good project management technique. 6.3 Further work Due to the time constraints on the project there were some features which could not be included. One of the features which could not be implemented was to include lighting on the street lamps. The idea behind this was that once the sun would go down at a certain time making a sunset and one the sun light had gone the street lights would come on. To gain further insight into exactly how humans behave some research using motion capture could be done. This could be done by getting a group of people of different genders and ages, to interact with each other and in different situations and to record their movements. This could increase the accuracy of the human behaviour in the simulation as real life data can be used. Another piece of additional work which could be included into the project is more human actions. Some of the actions which were not included in the simulation are to create a chatting action so that the humans could stop and chat with each other. Another action which would be included is sitting, meaning that the humans could sit down to watch the dolphin show instead of standing up. If there were more time one of the goals would be to make the zoo a lot bigger so there would be more space for more humans to be included. This could mean that there would be enough humans to group together to create group rules as researched in section 2.1. By making the zoo bigger more animals could be included which could also increase the amount of reactions the humans
37
have as different animals will gain different responses in humans. For example monkeys being playful and jumping about could inspire laughter in a human. If there was more time to spend on the project another area which would be investigated is expanding the audio of the zoo so that there would be more sound samples which could play instead of currently just having the one sound. The animal sounds would play depending on how close the camera is to the enclosure. This would mean that as the camera is moved past the penguin enclosure, for example, the penguin sound would play at this stage. This would increase the realism of the project and also pose as another factor the humans could react to, i.e. dolphin noise could mean the humans walk to the dolphin enclosure. Another idea, which was not implemented due to the time restrictions, was to include visibility catchment areas for the humans. This idea was discussed in section 2.7 and would be a good way of improving human behaviour and making decisions. The environment could have signs pointing to all the enclosures over the zoo, entry and exit and by determining the catchment area and applying a random number for how likely the human is to notice signs the humans can use this to determine where they head to. This would make the simulation much more realistic as in reality when humans walk about a zoo they do not know where all the enclosures are and rely on signs to direct them to the enclosures they wish to visit. Another idea which time did not permit to investigate was to use height mapping in the simulation. This would add to the realism to the environment. This involves using an image which is coloured according to how high the ground needs to be. So the colour of the image defines the height of the ground at that certain point. Another way is to use the alpha channel, if the alpha channel is set to 1.0 then the map is at maximum height and 0.0 it is at the minimum height. To improve the human behaviour in the zoo the idea to include families walking around the zoo together could be implemented. This would use the group rules ideas discussed in section 2.2. This would involve modelling more human models to include children. This would broaden the different types of behaviour as children act differently to humans. Children tend to be more hyperactive than adults do so their movements would be more exaggerated and would include running and jumping. Due to the time limits on the project the human movements using the equation below, discussed in section 3.8, could not be investigated to work to its full potential. This therefore was exchanged with the path idea. If there were more time this idea would be implemented to replace the paths. Position1 = Position0 + (∆Position . t) This would also mean the implementation of the O’Rourke line intersection code would be needed. This would be due to the human models having more freedom in their movement and therefore have the opportunity to walk through the fences into the enclosures.
38
References [3dsmax, 2006] 3dsmax, 2006, http://usa.autodesk.com/adsk/servlet/index?id=5659302&siteID=123112 [Comet, 2002] Character Animation: Principles and Practice, Michael B. Comet, Nov 19 2002, [Courseware, 2006] Index of /courseware/2005-2006/cmps3e29/Lab_Materials/ANIMALS, UEA, 2006, http://www.cmp.uea.ac.uk/courseware/2005-2006/cmps3e29/Lab_Materials/ANIMALS/ [Duindam, 2006] Dolphin, Penguin, Zebra, Flamingo, Index of /~duindam/dieren/sounds, 2006, http://home.kabelfoon.nl/~duindam/dieren/sounds/ [Edenwaith, 2003] Collision Detection, 31/10/03, http://www.edenwaith.com/products/pige/tutorials/collision.php [EXODUS, 2003] EXODUS overview Lecture, Prof Galea, 2003, http://fseg.gre.ac.uk/exodus/EXODUS_Overview_presentation.html [EXODUS Signage, 2003] EXODUS, “Simulating the Interaction of Pedestrians with Wayfinding Systems”, Lecture, Prof Galea, 2003, http://fseg.gre.ac.uk/PED2003/FSEG_presentations/index.html [Flexbeta, 2004] Full Version: play WAVE FILE coding C++, Flexbeta, 2004 http://www.flexbeta.net/forums/lofiversion/index.php/t2609.html [Hash, 2006] Spider Walk Cycle, 01/2006, http://www.hash.com/users/threechickens/Spider.htm [Hoppe, 2005] Progressive meshes, Hugues Hoppe, Microsoft Research, Proceedings of SIGGRAPH. ’96, pages 99-108, 15/11/2005, [Human, 2006] Human background noise, people012.wav, 2006, http://www.grsites.com/modperl/soundview.cgi?dir=people&fn=people012.wav&desc=Shopping %20mall%20ambience [Laycock, 2005] Dr Stephen Laycock, Virtual Environments II, October 2005, slides 6, 17, 30-36 [Laycock, Lapeer 2005] Dr Stephen Laycock and Dr Rudy Lapeer, Character Animation: animation of articulated objects, October 2005, Lecture notes
39
[Meta Motion, 2004] Motion Capture – What is it?, Meta Motion, 2004, http://www.metamotion.com/motion-capture/motion-capture.htm# [MSDN, 2006] Include File: MMSYSTEM.H, 2006, http://doc.ddart.net/msdn/header/include/mmsystem.h.html [Multisequence, 2006] Features, MULTISEQUENCE Main Screen, GoldEave Inc, 09 March 2006, http://www.goldwave.com/mqfeatures.php [Musse, 1997] Musse, S.R. & Thalmann, D. A model of Human Crowd Behaviour: Group InterRelationship and Collision Detection Analysis. Proceedings of the Eighth International Eurographics Workshop on Computer Animation and Simulation, September 1997, Eds. D. Thalmann and M. van de Panne, Springer-Verlag, 1997 [O’Rourke, 2001] ‘Computational Geometry in C, Second edition’, Joseph O’Rourke, 2001, Segment Intersection, pages 27-32. [Owen, 2000] Particle Systems, G. Scott Owen, 8th February 2000, http://www.siggraph.org/education/materials/HyperGraph/animation/particle.htm [Rymill, 2005] Stephen J. Rymill and Neil A. Dodgson. A Psychologically – Based Simulation of Human Behaviour. EG UK Theory and Practice of Computer Graphics, 2005, L.Lever, M. McDerby http://www.comet-cartoons.com/toons/3ddocs/charanim/ [SIGGRAPH, 2004] Crowd and Group Simulation, section 2.4 crowd visualization, DVD, course 33, page 43 46 Hery, C., Lippman, S., Ono, H., Regelous, S., Sutton, D. & Thalmann, D. Crowd and Group Animation. Course 33: On SIGGRAPH 2004 DVD-ROM 1, ACM SIGGRAPH 2004, Los Angeles, California, 8-12 August 2004.
40
Appendix A: The Environment and models The below screenshots show the animals in their enclosures, and humans walking around the zoo.
Figure A: Penguin
Figure B: Giraffe
Figure C: Zebra
Figure D: Humans
Figure E: Flamingo
Figure F: Dolphin
41
Figure G: Chameleon
Figure H: Spider
B: Controls for the Simulation
Input
Action
Special Keyboard Up arrow Down Arrow Left Arrow Right Arrow Insert PageUp Home End
Move Forward Move Backward Strife Left Strife Right Rotate Left Rotate Right Move Up Move Down
Keyboard V F R O C D X
Rain Stops Rain Cycles through lighting options Open Gates Close Gates Open Doors Close Doors
C: References of Video’s studied for the animal movements. Giraffe http://www.youtube.com/watch?v=_pwwu3leuPI&search=giraffe , 2006 http://www.youtube.com/watch?v=_ChzoWCSV48&search=giraffe , 2006 http://www.youtube.com/watch?v=qApJnGR4wfA&search=giraffe , 2006 Chameleon http://www.youtube.com/watch?v=V-2AUWBNJ6M&search=chameleon , 2006 http://www.youtube.com/watch?v=slw6rmoEkXc&search=chameleon , 2006 42
Penguin http://video.google.com/videoplay?docid=-3739793388454058277&q=penguin&pl=true , 2006 http://video.google.com/videoplay?docid=6246060779986044438&q=penguin&pl=true , 2006 http://www.youtube.com/watch?v=1tI5FU0tMtE&search=penguin , 2006 http://www.youtube.com/watch?v=7uP_sZk3HXY&search=penguin , 2006 http://www.youtube.com/watch?v=dpMD3CaXFMk&search=penguin , 2006 Zebra http://video.google.com/videoplay?docid=-2809946973351452387&q=zebra&pl=true , 2006 http://video.google.com/videoplay?docid=7436455491992480652&q=zebra&pl=true , 2006 Flamingo http://www.youtube.com/watch?v=ai-x_24UK3Y&search=flamingo , 2006 http://www.youtube.com/watch?v=kfHG_U_zF0w&search=flamingo , 2006 D: Classes and header files Classes human.cpp contains the information which is required for the humans. Position, Path number, avex.cpp contains the information for the mesh’s and the animation sequences. main.cpp contains the main methods animesh.cpp the mesh stuff for the loading of the models rain.cpp holds the structure for a rain particle objects.cpp holds the objects in the zoo for example the trees, images.cpp holds the information about each jpg and loads them in. bitmap.cpp used for loading in the textures for the models Init.cpp Used whilst loading in the jpeg’s Header files main.h human.h avex.h animesh.h rain.h objects.h images.h bitmap.h 43
init.h vector.h
E: Work Plan Diagram
Work Plan Actual: Collision Detection Planned: Collision Detection Actual: Closing Event Planned: Closing Event Actual: Rain Planned: Rain Actual: Importing code Planned: Importing code Actual: Sound Planned: Sound Aims
Actual: Model Movements Started
Planned: Model Movements
Completed
Actual: Animal Animations Planned: Animal Animations Actual: Animal Models Planned: Animal Models Actual: Human Animations Planned: Human Animations Actual: Human Model Planned: Human Model Actual: Environment Planned: Environment Whole Project 17/02 28/05 05/09 14/12 24/03 02/07 /2005 /2005 /2005 /2005 /2006 /2006
44
Dates